- Node.js 菜鸟教程
- Node.js - 教程
- Node.js - 简介
- Node.js - 环境设置
- Node.js - 首次申请
- Node.js - REPL 终端
- Node.js - 命令行选项
- Node.js - 包管理器 (NPM)
- Node.js - 回调概念
- Node.js - 上传文件
- Node.js - 发送电子邮件
- Node.js - 活动
- Node.js - 事件循环
- Node.js - 事件发射器
- Node.js - 调试器
- Node.js - 全局对象
- Node.js - 控制台
- Node.js - 流程
- Node.js - 扩展应用程序
- Node.js - 包装
- Node.js - Express 框架
- Node.js - RESTful API
- Node.js - 缓冲器
- Node.js - Streams
- Node.js - 文件系统
- Node.js MySQL
- Node.js - MySQL 快速入门
- Node.js - MySQL创建数据库
- Node.js - MySQL创建表
- Node.js - MySQL Insert Into
- Node.js - MySQL Select From
- Node.js - MySQL Where 子句
- Node.js - MySQL Order By
- Node.js - MySQL Delete
- Node.js - MySQL Update
- Node.js - MySQL Join
- Node.js MongoDB
- Node.js - MongoDB 快速入门
- Node.js - MongoDB 创建数据库
- Node.js - MongoDB 创建集合
- Node.js - MongoDB Insert
- Node.js - MongoDB Find
- Node.js - MongoDB 查询
- Node.js - MongoDB 排序
- Node.js - MongoDB Delete
- Node.js - MongoDB Update
- Node.js - MongoDB Limit
- Node.js - MongoDB Join
- Node.js模块
- Node.js - 模块
- Node.js - 内置模块
- Node.js - utility 模块
- Node.js - Web 模块
Node.js - 首次申请
在学习一门新语言或框架时,首先要编写的应用程序是 Hello World 程序。此类程序显示 Hello World 消息。这说明了该语言的基本语法,还用于测试语言编译器的安装是否正确完成。在本章中,我们将用 Node.js 编写一个 Hello World 应用程序。
控制台应用程序
Node.js有一个命令行界面。Node.js 运行时还允许您在浏览器之外执行 JavaScript 代码。因此,任何 JavaScript 代码都可以在带有Node.js可执行文件的命令终端中运行。
将以下单行 JavaScript 另存为 你好.js 文件。
console.log("Hello World");
在存在你好.js文件的文件夹中打开powershell(或命令提示符)终端,然后输入以下命令 -
Hello World
Hello World 消息将显示在终端中。
创建Node.js应用程序
要使用 Node.js 创建 “Hello, World!” Web 应用程序,您需要以下三个重要组件 -
- 导入所需的模块 - 我们使用 require 指令来加载Node.js模块。
- 创建服务器 - 一个服务器,它将监听客户端的请求,类似于Apache HTTP服务器。
- 读取请求并返回响应 − 在前面步骤中创建的服务器将读取客户端发出的HTTP请求,客户端可以是浏览器或控制台,并返回响应。
第 1 步 - 导入所需模块
我们使用 require 指令来加载 http 模块并将返回的 HTTP 实例存储到 http 变量中,如下所示 -
var http = require("http");
第 2 步 - 创建服务器
我们使用创建的 http 实例并调用 http.createServer() 方法来创建服务器实例,然后使用与服务器实例关联的 listen 方法将其绑定到端口 3000。向它传递一个带有参数 request 和 response 的函数。
createserver()方法的语法如下 -
http.createServer(requestListener);
requestlistener 参数是一个函数,每当服务器从客户端收到请求时就会执行。此函数处理传入的请求并形成服务器响应。
requestlistener 函数从运行时获取请求 HTTP 请求和响应对象Node.js并返回 ServerResponse 对象。
listener = function (request, response) {
// Send the HTTP header
// HTTP Status: 200 : OK
// Content Type: text/plain
response.writeHead(200, {'Content-Type': 'text/html'});
// Send the response body as "Hello World"
response.end('<h2 style="text-align: center;">Hello World</h2>');
};
上述函数将状态代码和内容类型标头添加到 ServerResponse 和 Hello World 消息中。
此函数用作 createserver() 方法的参数。服务器用于侦听特定端口的传入请求(让我们分配 3000 作为端口)。
第 3 步 - 测试请求和响应
编写示例实现以始终返回“Hello World”。将以下脚本另存为 你好.js。
http = require('node:http');
listener = function (request, response) {
// Send the HTTP header
// HTTP Status: 200 : OK
// Content Type: text/html
response.writeHead(200, {'Content-Type': 'text/html'});
// Send the response body as "Hello World"
response.end('<h2 style="text-align: center;">Hello World</h2>');
};
server = http.createServer(listener);
server.listen(3000);
// Console will print the message
console.log('Server running at http://127.0.0.1:3000/');
在 PowerShell 终端中,输入以下命令。
Server running at http://127.0.0.1:3000/
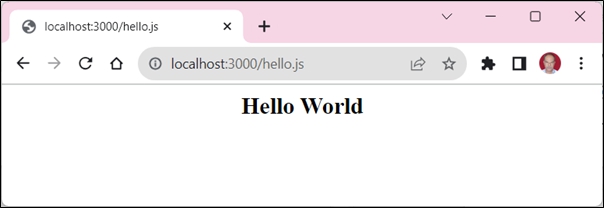
该程序在本地主机上启动 Node.js 服务器,并在端口 3000 处进入侦听模式。现在打开浏览器,输入 http://127.0.0.1:3000/ 作为 URL。浏览器会根据需要显示 Hello World 消息。